Pages

Wednesday, 19 April 2017

Quilt Planning...Plan Quilting

I sit down to write a blog post every few months. The post makes it to the draft stage, I go hunting for photos, get distracted, and that's the end of that.

I am determined to get this one posted. Just like I am determined to get organised this year.
The Quilters Planner was to be my saviour. So let's just ignore the fact it's more than mid-way through April and celebrate a finish.

So what do you need to get organised? Cover the planner comes to mind...

This zippy cover tutorial is provided on the Quilters Planner website and was easy...and more importantly...fun to make.

Confession time...I hoard selvedges. This just seemed to be the most perfect use for them, and the way it's turned out...well let's just say that I can't wipe the silly grin off my face.
Front of the zippy planner cover

Back of the zippy planner cover
Somewhere or other, I'm sure I've mentioned that I have a predilection for paisley...not the first pattern that comes to mind for modern quilters...but if I'm going to get maximum use out of this planner, there had to be paisley somewhere in the cover.

Several years ago I impulse bought (confession number two: nothing has changed over the years), some fabrics from the "Cuteville Country Fair" range, mostly because of the red and blue colourways of the paisley.
I've used it for the inside front and back flap covers and the contrast gingham and triangle patterns make me very happy.
Inside front flap cover

Inside back flap cover
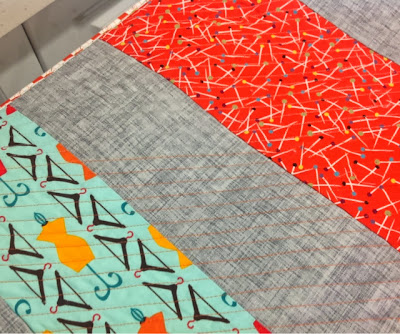
The cover has a zip pouch at the front, a pocket on each inside flap, a needle minder on the inside front. There's a scissor minder and business card sized pocket...credit cards fit too... on the back. The obligatory measuring tape twill bookmark is there too...and elastic to hold it closed.
I am convinced all that stuff that will make me churn out quilts at an alarming rate...

So now I have the outside all sorted...time to make a start on using the inside...


thanks for taking a peek over the fence...


Wednesday, 27 August 2014

quiet...but not quiet

Things have been quiet on one side of the fence - hardly any "posts" (ha ha, I crack myself up sometimes), but over on my side, it's been a hectic rush of HSC major works, the MatH (Man about the House) travelling for work, my (paid) job, housework (unpaid job) and a sanity-saving amount of sewing...oh not to mention the fantastic trip to visit family and friends on the other side of the world that happened earlier in the year.

So where to start...maybe I'll just work backwards...

Currently in the sewing room, and spread out through the laundry and the lounge room, is the 21st birthday quilt -for the 22 yr BatH (boy about the house) who will get it before he turns 23!

The kaleidoscope blocks come from the SBH flickr swap that I was in, in 2012.  I still have to add the top and bottom grey borders, another border of 12" sawtooth stars (cutting in progress), a 6" light blue and dk blue strip border (cut and pieced) and the last border will be black/dkgrey & white/light grey flying geese (thought about).

Some delicious fabric has made its way into the house...
MoMo...old and new ranges...totally addicted...
I get them out to play with, dream about cutting into them, then chicken out.

Botanics...what can I say...if Craftsy want to sell it off, who am I to argue...
I like to help out friends who want to destash too...hello Tula...

That's a start to catching up - there's still a lot more, both fabrics *blush* and projects, to come.

I'll leave you with a last cute little project - a request to make a mini flannelette shirt for a work colleague's new grandson - finished on the weekend...


thanks for taking a peek over the fence...

Sunday, 22 June 2014

The Sew Together Bag...and the not so fiddly zipper tabs.


Sunday Sewalong at the GWSMQG are a highlight of each month...yeah I don't get out a lot!
Last weekend was the June Sunday, and a plan was hatched to have a group sew along - and what better to sew together than the Sew Together Bag. This is a downloadable pattern from Sew Demented on Craftsy

I really shouldn't have started yet another project,
but the fact,
* it is FINISHED,
* it was great to have assistance from someone who'd already made it,
* I cut into my Charley Harper fabric,
* it doesn't take up a lot of fabric,
* you can use scraps to make the outer shell, and
* you'll lose your fear of zips,
I figured I'd was ahead before I'd even started!


So two of the things that I learnt from following in someone else's footsteps are:
a)  that the zipper tabs are a fiddly as all get out, and
b) an 18" zipper is a tight fit if you're trying to avoid the metal bit, luckly I did have a 20" zipper (thanks @iamacraftykat).

The Quilt Barn has a sewalong on the blog that is worth checking out for great detail on the construction.

One problem I found with the pattern is the minimal photos and diagrams. The explanation of the zipper tabs seems a bit unclear and there are no photos or diagrams of this particular step. The way it is done in the Quilt Barn Sew Along, looks really awkward (to me, anyway)...much better to sew the sides first rather than all that pinning and trying to get folded seam allowances to stay put.
The way I sewed them is perhaps what the pattern instructs you to do, but with the lack of diagrams, it's hard to tell. The ones I sewed just slip onto the end of the zipper...

Anyway here goes with my version:

- fold your fabric in half and finger press the fold.
- open out and with wrong side facing up, turn up the short raw edge towards the fold and iron or finger press - I turned up mine about 1 1/4", on either side of the fold.

- the fold in half again with right sides together, and pin to hold in place.

- the width of the zipper and binding is 1 1/2" , so by sewing a scant 1/4" seam along each side of the zipper tab you will still have a wide enough opening for the zip to slide in to...

- sew 1/4" seam along each raw edge side LEAVE THE OPENING WITH THE FOLDED UP ENDS OPEN!
- turn right side out through the opening...and you have a tiny wee pouch with neatly folded in ends.

- there's no need to trim seam allowances (because you didn't go around a corner)...just gently poke out with a skewer, so the sides are neat and square.

- it's really easy to poke the zipper inside the wee pouch and push it down to the end...just scrunch it together a bit and shove, then smooth out! I just made sure there was no metal where I want to top stitch this in place.
- topstitch 1/8" in around all four sides.
The last step is to sew the bound ends to the middle of each side for your handle.


Look at all that Charley Harper lovliness! Such happy, happy colours! And cute birds! And gold and blue leaves! And a little red pincushion!


thanks for taking a peek over the fence...

Wednesday, 1 January 2014

Bye Baby Bunting...Hello 2014

Well hello 2014...where did you come from? Sneaking up on me like that...you should be ashamed of yourself! You're here to stay you say? Ok I'll have to make the best of  it then!

I did say that my next post would be about making mini-bunting, and even if it has taken 3 months, here it is!

Just to recap, the bunting postcard was made for the Great Big Stitched Postcard Swap #6 . It made it into the round-up post, which was a bit of a buzz!

So, if you've ever felt like making minuscule bunting you've come to the right place...

Gather your supplies:

  • scraps of fabric - smallest size is 1 1/4" squares.. I had quite a few 2 1/2" squares that I cut in half and then used one of the halves to make two small squares, keep the other 1 1/4" x 2 1/2" rectangle for the bunting "string".
  • quilters awl or unpicker or even a small skewer ( helps with holding and folding)
  • tweezers (ditto ) 
  • usual sewing supplies, sewing machine etc...(you're not silly I shouldn't have to point out the obvious!)
pretty scraps
Cut 1 1/4" squares from your scraps.
1.25" scrap squares
If you are using 2 1/2" squares, cut them in half, and make two small squares and one rectangle.
cut 2.5" squares in half
Here's my finished pile of 1 1/2" squares and the leftover rectangles...make mine rainbow thanks!
scrap squares and rectangles
(I didn't realise how bad these photos were but if I wait to take them again in better light this tutorial might get posted sometime in 2014! ha ha ha guess what? It does get posted in 2014 and the pics didn't get retaken!)

Take one square and fold it in half to form a rectangle:
fold square in half

Fold the bottom right hand corner of the folded edge up to about 1/3 in from the left hand edge

Then take the other folders corner and bring it up to lap over to the right hand side - you've basically folded the rectangle into 3. Make sure you have a nice sharp point at the bottom.
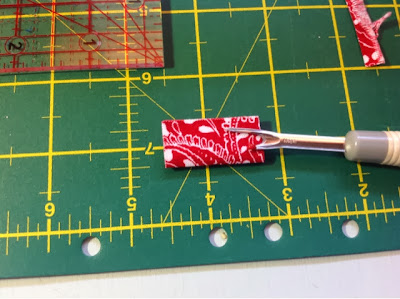
Turn it over - tweezers are a big help here- so the "pointy" bits and fold are at the back.


As you fold each one, feed them through the machine with the aid of your unpicker/awl/skewer.

Don't separate them, leave them in one long line.
Hard to tire of looking at all that cuteness!
Now you've done the bunting, sew those rectangles together into one long strip, open out the seams and iron them flat. 
Then fold them in half down the length, iron well...starch is your friend with this mini stuff...open out the fold,  and then fold each long side into the centre and iron well again (see picture below), just like you are making binding, which of course is exactly what you are doing!
Start inserting the first little triangle and clip in place. See how they are all chained together - you just shove and peg, shove and peg, till you get the arrangement you want.

I made two strips as they fitted the layout of the 6" x 4" postcard.
The binding hides the stitches and keeps those pesky tails that may not quite get sewn, hidden away too!
Snip off the tips of the prominent pointy bits if they didn't fit neatly, but be careful not to cut your stitches.
I sewed slowly over each piece and it fed through the machine fine.
I tried my zipper foot but the results were pretty ordinary, so I went back to the general sewing foot. I also lengthened the stitches which gave a nice effect

And here's the finished product again:


I hope you have fun making mini bunting...now wasn't that worth the wait?

Thanks for taking a peek over the fence...

Tuesday, 1 October 2013

Making not missing...

So I've been just a bit lax on the blogging side, but I haven't been idle...


I bought the Noodlehead basket pattern to make for my partner for the Sewing Room Swap, then I wished I had the social tote pattern instead.
So I forged ahead and made my own version of a project carry tote for carting various sewing projects around...you know...as far as the lounge while watching Sherlock or Elementary, my usual Sunday night treat before the week begins in earnest! I based it on the tote I made for this swap earlier in the year.

Project tote

This is what I ended up making for my partner in that swap...I had a hard time parting with this sewing machine cover for the, but it went to a home where it's loved to bits  ..."linda lawsons place".
sewing machine cover-back

sewing machine cover-front with pocket

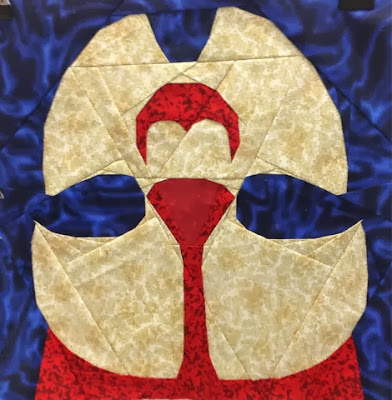
I had promised myself that I'd do two "block of the months" this year (surely I could find two days a month to sew...ha ha ha ha ha, what was I thinking?)  I've only managed to get two Doctor Who paper pieced blocks made...The T.A.R.D.I.S.
T.A.R.D.I.S.
and The Time Lord
Time Lord block
I'd really like to get caught up with these by the end of the year...(see above laugh!)

The Great Big stitched Postcard Swap is back for round #6. The theme is celebrate and I've made the cutest little bunting...the card size is just over 6" x 4" so the bunting is fairly tiny. Next post I'll run a few tutorial pictures so you can make your own...you know, just in case you get the urge to make miniature, cutesy bunting of your own!
"Celebration" themed fabric postcard


thanks for taking a peek over the fence... 

Tuesday, 10 September 2013

Pop-Up Scrap/Thread Bin Tutorial

I'm always looking for quick small gifts to add to swap parcels.

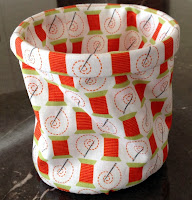
Scrap Thread Bin - opened upScrap Thread Bin - folded
This little portable thread/scrap bin was inspired by the Thread Catcher tutorial on Red Hen Fabric's quick projects page. That tutorial uses a 4" wooden inner from an embroidery hoop.

I wanted to be able to machine finish most of the project - there is still hand sewing...but nothing like the stand out dodgy running stitches I did to keep the hoop in place.

This tutorial makes a casing where you can push in a stiffening piece instead of the wooden hoop. I used rigilene for this tutorial and in one prototype, I used the plastic strapping that comes off packages!

SUPPLIES:
  • Fat quarter of fabric 
  • Cardboard
  • Scrap of batting
  • Rigilene (or plastic strapping) - 1/2" or 12mm wide
  • Matching thread
  • 4" diameter circle template/saucer/bowl/compass...or whatever you have handy
  • General sewing supplies

CUTTING INSTRUCTIONS:
From the
CARDBOARD cut 2 x 4" circles.

FABRIC: One rectangle of fabric 11" x 14"
             Trace two circles onto fabric then cut out 1" bigger all around.

BATTING: Cut one piece of batting the exact size of the cardboard.

RIGILENE: Cut one strip of rigilene 15 ½" long. 

The finished size is approximately 4 1/2" high and 4" in diameter.

Supplies

rigilene
METHOD:
On one 11" edge of the fabric, mark the halfway point - at 5½", then another point 5/8" away. (note: if your rigilene/plastic strapping is wider than 1/2" you MUST leave a larger gap...add approximately 1/8" to the width of whatever you are using).
Fold your fabric in half, short sides together and sew the side seam, using a 1/2" seam allowance, up to the first pencil mark, back stitch a few times, lift your needle out and move to the next pencil mark and commence sewing again - backstitch here too. Sew to the end.
 When you're done there will be a small unsewn gap in the seam.
Press the seam open and then fold the fabric tube in half  WRONG SIDES TO THE INSIDE.
The gap for the casing should be facing you.
Each of those raw edges need to be hemmed with a 1/4" turn up seam.
To sew the casing, mark a line 5/8" away from the fold, sew all around and you have the finished casing.
Then thread the rigilene/plastic strapping through the gap and push the tails inside behind one another. The fabric tube will keep the round shape nicely. (It's just occurred to me that if you want a firmer top, just cut a much longer length and feed around twice).
*handsewing alert! Sew the gap together with small whip stitch or ladder stitch...don't groan it's only 5/8" long!

The rest of the tutorial is pretty much the same technique that the original Red Hen Fabric's tutorial.
Making the base:
Take one of your fabric circles, one of the cardboard circles and the batting piece. Layer as shown in the photo, then gather the fabric up like you are making a large yo-yo. Pull up firmly and tie off.
Do the same for the second circle - only there will be NO BATTING layer
*handsewing alert! Then whipstitch your two circles together.
*handsewing alert! Now you need to sew the base to one end of the fabric tube.
Move the inner layer out of the way and stitch the finished base - batting side out, to the hemmed edge. There is a little bit of give in the fabric tube, so just ease onto the base as neatly as you can.
That is the first side done.
In the photo below you will see the sewn base on the left and the loose end on the right.
Push the base all the way through, past the rigilene rim, to meet up with the unsewn fabric on the right.
The picture below shows what you will end up with, it's just photographed from the other side.
As long as you've pushed the base through and can see where you need to attach the lining you are doing the right thing. Pushing it through creates the "lip" of the bin too. The batting side will be inside the bin and the flat base with no batting will be on the outside so it will stand up flat.
*handsewing alert! More hand sewing, but you're only a circle away from finishing!
Sew the flat base to the other hemmed edge.
Now you see it...
Now you don't!

These are great little swap gifts and are lighter using the rigilene for posting overseas.
I hope you have fun making lots of them!
I encourage you to go and look at the Red Hen Fabrics tutorial page too.

If you have any problems with any part of the tutorial just email or leave a comment.

thanks for taking a peek over the fence...

LinkWithin

Related Posts with Thumbnails